Gel cat eye nail polish is the ultimate way to elevate your nail game. This captivating guide dives deep into the world of shimmering, glittery, and opaque options, revealing the secrets to achieving stunning cat eye effects and mastering the art of application.
From understanding the different types and benefits of gel cat eye nail polish to exploring various color combinations and design trends, this comprehensive guide covers every facet of this popular nail trend. Learn the essentials for selecting the perfect polish, preparing your nails, and applying the polish like a pro. Discover how to maintain the vibrant look and master the effortless removal process for lasting brilliance.
Introduction to Gel Cat Eye Nail Polish
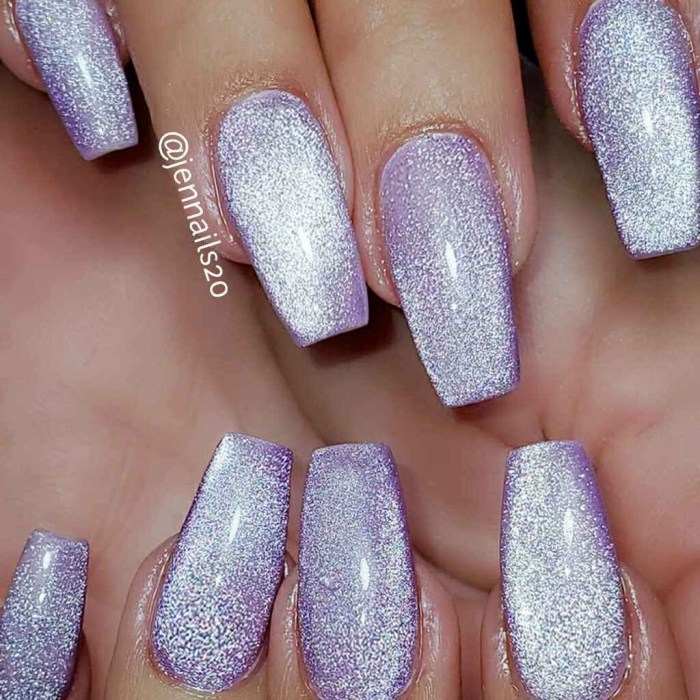
Gel cat eye nail polish is a captivating nail art technique that combines the durability of gel polish with the mesmerizing, eye-catching effect of a cat eye design. It’s a popular choice for those seeking long-lasting, glamorous nails with a unique, shimmering appeal. This technique allows for intricate color gradients and captivating shine, making it a favorite among nail enthusiasts.This innovative nail polish type offers a range of finishes, from subtle shimmer to bold glitter, and provides a striking visual impact.
It is also known for its superior durability compared to traditional nail polish.
Types of Gel Cat Eye Nail Polish
Gel cat eye nail polish comes in a variety of finishes. Shimmer effects create a delicate, iridescent look, while glitter options offer a more prominent sparkle. Opaque gel cat eye polishes provide a solid color base with the cat eye effect on top. The choice depends on the desired aesthetic and the level of visual impact. Different color combinations and variations are also possible, creating personalized and eye-catching designs.
Benefits of Gel Cat Eye Nail Polish
Gel cat eye nail polish boasts several advantages over traditional nail polish. Its superior durability ensures long-lasting wear, typically lasting several weeks without chipping or fading. This translates to reduced frequency of touch-ups, saving time and effort. The application process, while slightly more involved than traditional polish, yields a highly polished and professional-looking result. Gel polish’s strength and resistance to daily wear and tear contribute to its enduring popularity.
Comparison with Other Nail Polish Types
| Feature | Gel Cat Eye | Acrylic | Regular Polish |
|---|---|---|---|
| Durability | Excellent, typically lasting 2-3 weeks with proper care. | Very durable, potentially lasting several weeks or months. | Moderate, typically lasting a few days to a week, susceptible to chipping and wear. |
| Application Time | Medium, requiring preparation and curing time under a UV/LED lamp. | Medium to high, with a lengthy application process and drying time. | Low, quick application with no curing required. |
| Removal Process | Requires a specific remover or soak-off method. | Requires a specialized removal solution and often a filing process. | Easy removal with regular nail polish remover. |
This table highlights the key differences in durability, application time, and removal procedures between gel cat eye, acrylic, and regular nail polish. Choosing the right type depends on individual needs and preferences. For instance, someone prioritizing long-lasting wear might opt for gel cat eye or acrylic, while someone seeking a quick and easy application might prefer regular polish.
Application Techniques
Mastering the art of gel cat eye nails involves precision and technique. A smooth, flawless application is key to achieving the desired dramatic cat eye effect. Understanding the steps and tools will elevate your nail artistry to the next level.Applying gel cat eye nail polish is a multi-step process, demanding attention to detail at each stage. The correct application sequence ensures the polish adheres evenly and creates a long-lasting, stunning design.
Different techniques are employed to achieve various cat eye effects, from subtle gradients to bold, defined lines.
Step-by-Step Application
This meticulous process ensures a professional finish. First, prepare the nails with a thorough cleaning and shaping. Next, apply a base coat for protection and adhesion. Then, the key element – the gel cat eye polish – is carefully applied in thin layers. This prevents clumping and ensures an even distribution.
Techniques for Creating Cat Eye Effects
Several techniques allow for diverse cat eye designs. One technique involves using a fine liner brush to create a precise line along the lash line. Another approach is layering different shades of gel polish to achieve an ombre or gradient effect. This can involve using a blending tool for a smooth transition between colors.
Tools and Materials Needed, Gel cat eye nail polish
A comprehensive set of tools is essential for a successful gel cat eye application. The process requires precision and control, so having the right tools is crucial.
- Nail Preparation Tools: These include nail clippers, files, and buffers for shaping and smoothing the nails. A cuticle pusher is essential for gently pushing back the cuticles.
- Application Tools: A gel polish applicator brush is essential for applying the polish evenly. A fine liner brush allows for intricate detailing. A blending tool, like a small spatula or blending brush, is useful for creating smooth gradients and diffusing color. A small brush and a precision brush will come in handy.
- Gel Polish: High-quality gel polish is crucial for a professional look. The formula should be pigmented enough to create a dramatic effect and should adhere well to the nails.
- Base Coat and Top Coat: A base coat protects the nail plate and enhances adhesion. A top coat seals the polish, providing durability and a glossy finish.
- UV/LED Lamp: A UV or LED lamp is essential for curing the gel polish, hardening it and making it long-lasting.
- Nail Prep: A nail prep solution is recommended for preparing the nail plate and ensuring a better bond.
- Cleaning Supplies: Acetone, cotton pads, and a nail brush are essential for cleaning up any spills and removing excess polish.
Essential Tools for Gel Cat Eye Nail Polish
A well-stocked toolkit is critical for flawless results.
- UV/LED Lamp: The lamp cures the gel polish, hardening it for long-lasting wear. Different types of lamps have varying curing times.
- Gel Polish: High-quality pigmented gel polish in various shades is essential for creating different cat eye effects.
- Base Coat: This creates a protective layer for the nail and ensures good adhesion of the gel polish.
- Top Coat: This final layer adds shine and protects the gel polish from chipping.
- Fine Liner Brush: For creating precise lines and details in the cat eye design.
- Blending Brush/Spatula: These are useful for blending colors and creating smooth gradients.
Color and Design Variations
Gel cat eye nail polish offers a plethora of possibilities for creative expression, transforming nails into vibrant canvases. Beyond the mesmerizing shimmer, the color combinations and design trends are constantly evolving, providing endless options for personalization. From subtle gradients to bold statements, gel cat eye allows for a diverse range of styles, making it a favorite among nail enthusiasts.The versatility of gel cat eye nail polish extends far beyond simple application.
Gel cat eye nail polish is totally rad, like, seriously vibrant colors that last forever. Finding the perfect place to chill, like those sweet Park Hill Apartments in Gainesville, GA, park hill apartments gainesville ga , is key when you’re trying to keep your nails looking fresh. I mean, who wants to worry about touch-ups when you’re hanging out?
So, yeah, gel cat eye is the way to go for that perfect, long-lasting look.
The unique interplay of color and light creates a mesmerizing effect that captures attention. This allows for an array of creative possibilities, from sophisticated monochromatic palettes to bold and vibrant multi-color designs. The fluidity of the color gradients and the interplay of light allow for the development of distinctive and eye-catching nail art.
Popular Color Combinations
A variety of color combinations are popular in gel cat eye nail polish, reflecting current trends in fashion and aesthetics. These combinations range from soft, neutral tones to bold, contrasting palettes. Neutral palettes often incorporate shades of beige, taupe, and blush, while brighter palettes include jewel tones, such as emerald green, ruby red, and sapphire blue. Mixing these colors can create captivating gradients and mesmerizing color transitions.
Design Trends and Styles
Gel cat eye nail polish is not limited to a single style. Design trends range from minimalist aesthetics to elaborate floral patterns. Minimalist designs often feature a single, elegant color gradient, highlighting the polish’s unique shimmer effect. On the other hand, elaborate floral designs incorporate intricate details, adding a touch of sophistication and femininity to the nails.
Other trends include geometric patterns, ombre effects, and even 3D designs, all possible with gel cat eye polish’s versatility.
Gel cat eye nail polish is seriously awesome, right? It’s like, totally perfect for a beach trip. You know, like, checking out those amazing views at pretty beach campground – murramarang national park photos pretty beach campground – murramarang national park photos. The vibrant colours totally pop against the sand and water. So, yeah, gel cat eye nail polish is definitely a must-have for any beach adventure!
Popular Nail Art Designs
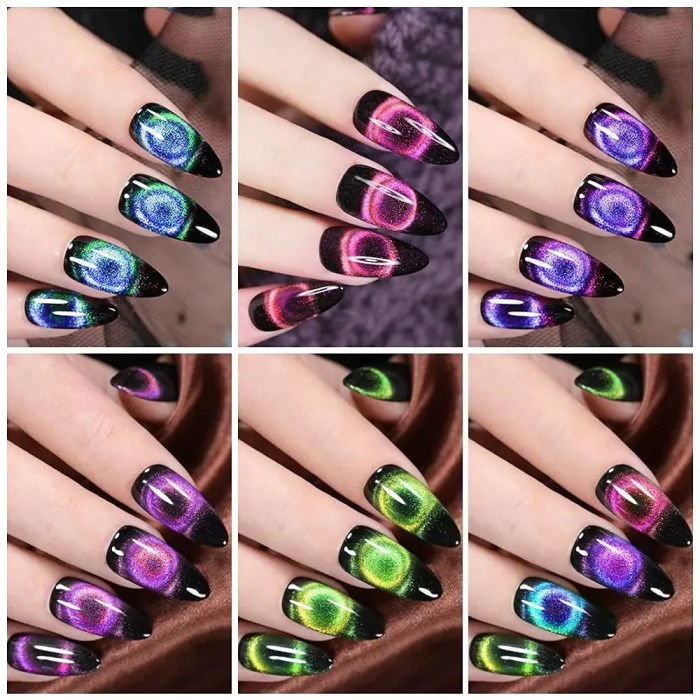
Several nail art designs incorporate gel cat eye polish. A popular choice is the “galaxy” design, which uses various shades of shimmery blues, purples, and blacks to create a mesmerizing cosmic effect on the nails. Another popular choice is the “ombre” design, creating a seamless transition between two or more colors, showcasing the polish’s smooth application and blending capabilities.
This can range from classic neutral tones to striking color contrasts.
Color Palette Examples
| Color Palette | Description | Example Image |
|---|---|---|
| Sunset Hues | A gradient from warm peach to fiery orange, ending in a golden shimmer. | (Imagine a visual representation of this gradient. Picture a peachy-orange base, transitioning to a brighter orange, and culminating in a gold/bronze shimmery tip.) |
| Mystic Night | Deep blues and purples, with a touch of metallic silver, creating a celestial effect. | (Envision a dark navy blue base, blending into a deep violet, and finally culminating in a metallic silver shimmer.) |
| Spring Blossom | Soft pastels, such as lavender, mint green, and peach, creating a delicate and feminine look. | (Picture a light lavender base, transitioning to a mint green, and ending with a peachy shimmer.) |
Product Selection and Considerations
Choosing the perfect gel cat eye nail polish goes beyond just picking a pretty color. Factors like the quality of the formula, brand reputation, and your personal nail health play a crucial role in achieving long-lasting, stunning results. Understanding these considerations empowers you to make informed decisions and enjoy flawless cat eye manicures.
Factors to Consider When Choosing Gel Cat Eye Nail Polish
Several key aspects influence the selection of gel cat eye nail polish. Brand reputation, price, and the specific formula’s ingredients all impact the quality and longevity of the manicure. Consistency and ease of application are also vital for achieving a professional finish. Furthermore, consider the specific application techniques required by the polish.
Comparing Different Brands
Different brands offer varying qualities in gel cat eye nail polish. Some excel in vibrant color payoff, while others focus on durability and chip resistance. Researching reviews and comparing formulas can help you determine which brand best suits your needs. Consider factors such as the polish’s texture, viscosity, and the ease of achieving the cat eye effect. This informed comparison allows you to choose a product that delivers optimal results.
Importance of Proper Nail Preparation
Thorough nail preparation is paramount for a successful gel cat eye manicure. Clean, healthy nails provide a strong base for the polish to adhere to, ensuring a longer-lasting and more aesthetically pleasing result. Proper nail preparation also helps prevent potential issues like lifting or chipping, leading to a more satisfactory overall experience.
Selecting the Best Gel Cat Eye Nail Polish Based on Preferences
Individual preferences play a significant role in selecting the perfect gel cat eye nail polish. Factors like desired color intensity, application ease, and the longevity of the manicure influence the decision. Consider whether you prefer a quick-drying formula, a vibrant color, or a more subtle effect. Understanding these preferences allows you to narrow down your choices and select the polish that best meets your specific needs and desires.
Brand Comparison Table
| Brand | Pros | Cons |
|---|---|---|
| Brand A | Vibrant colors, smooth application, good longevity, affordable | Can sometimes have a slightly uneven texture, may require multiple coats |
| Brand B | High-quality formula, long-lasting, chip-resistant, various color options | Slightly more expensive than Brand A, may require specific application techniques |
| Brand C | Easy to apply, creates a beautiful cat eye effect, wide range of shades | May not be as long-lasting as other brands, drying time can be variable |
Maintenance and Removal: Gel Cat Eye Nail Polish
Keeping your stunning gel cat eye nails looking their best requires a little TLC. Proper maintenance extends the life of your manicure, preventing chipping, cracking, and premature lifting. This section will guide you through the essential steps for maintaining your gel cat eye nails and safely removing them when it’s time for a change.
Maintaining Gel Cat Eye Nail Polish Longevity
Proper care is key to extending the lifespan of your gel cat eye manicure. Regular touch-ups and diligent upkeep will help your nails stay vibrant and intact for longer periods.
- Regular Cleaning: Gently clean the nail surface with a soft brush and a mild cleaner to remove any dirt, debris, or oils that can affect the bond and lead to premature lifting. This should be done daily or at least every other day.
- Avoiding Harsh Chemicals: Avoid exposure to harsh chemicals or solvents that can weaken the gel coating. This includes strong detergents, acetone-based nail polish removers, and abrasive cleaners.
- Avoiding Excessive Moisture: Avoid prolonged exposure to water, particularly during the initial few days after application. Keeping your hands dry, especially when washing dishes or handling wet objects, can significantly reduce the risk of lifting or chipping.
- Gentle Handling: Be careful when handling your nails, and avoid hitting or bumping them against hard surfaces. Excessive pressure or impact can cause chipping or cracking. Use caution when performing activities that could potentially damage your nails, like playing sports or using tools that could cause contact with hard surfaces.
Proper Gel Cat Eye Nail Polish Removal
Removing gel cat eye nail polish requires careful technique to avoid damaging your natural nails. Using the correct tools and following a precise process is crucial for a successful and safe removal.
- Gather Your Supplies: You will need a high-quality acetone-free gel remover, a cotton ball or cotton pad, and a nail file. For extra care, consider using a cuticle pusher or orangewood stick. A bowl of warm water and a gentle moisturizer are also beneficial for hydration.
- Prepare Your Nails: Gently push back your cuticles and trim any excess nail length. This step ensures a better grip and allows for easy application of the removal solution.
- Apply the Remover: Carefully apply a generous amount of acetone-free gel remover to a cotton ball or pad, avoiding contact with the skin surrounding your nails. Cover your entire nail surface with the cotton, making sure it stays in place.
- Wrap and Wait: Wrap a second cotton pad or ball over the first, and cover the area with plastic wrap. This helps to create a barrier to prevent evaporation of the remover and ensures more effective dissolving of the gel.
- Monitor and Remove: Check on your nails every 5-10 minutes. When the gel begins to soften, carefully remove the cotton pads and gently file the softened gel off with a nail file, taking care not to damage your natural nails. This should be done with a very light hand.
- Cleanse and Moisturize: Once the gel is removed, cleanse your nails with warm water and a mild soap. Apply a cuticle oil or moisturizer to hydrate and nourish your nails.
Potential Risks and Precautions
Gel polish removal, even with careful technique, carries some potential risks. Understanding these risks and taking appropriate precautions can help minimize any negative impacts.
- Nail Damage: Using harsh chemicals or improper techniques can lead to damage to your natural nails, including thinning, weakening, and splitting. It is crucial to use a proper acetone-free gel remover to minimize this risk.
- Skin Irritation: Direct contact with acetone or harsh chemicals can cause skin irritation, dryness, or allergic reactions. Always use gloves or moisturize the surrounding skin before removing the polish.
- Infection: Compromised nail beds can increase the risk of infection. Keeping your nails clean and using proper hygiene during the removal process can help minimize this risk.
Safe Home Removal Guide
A home removal process can be safe and effective if you follow these steps carefully.
“Always use acetone-free gel remover and avoid prolonged exposure to the remover.”
- Choose the Right Remover: Select a high-quality acetone-free gel remover specifically designed for gel polish removal. Acetone-based removers can damage the natural nail plate and should be avoided.
- Proper Application: Apply the remover to the nail surface using cotton balls or pads, and cover the area with plastic wrap for efficient removal. Avoid direct contact with the skin.
- Gentle Filing: Once the gel has softened, use a nail file to gently scrape off the softened gel. Avoid excessive pressure.
- Aftercare: Cleanse and moisturize your nails with a cuticle oil or moisturizer to promote healthy nail growth and hydration. Moisturizing is critical to prevent dryness after the removal process.
Troubleshooting and Tips
Gel cat eye nail polish, while offering stunning visual appeal, can sometimes present challenges during application. Understanding common pitfalls and implementing effective troubleshooting strategies can significantly enhance your experience and lead to consistently flawless results. This section delves into practical solutions for achieving professional-looking cat eye nails.Successfully mastering gel cat eye nail application requires a keen understanding of the process and a willingness to troubleshoot potential issues.
By addressing these concerns proactively, you can avoid costly mistakes and create stunning nail art with ease.
Uneven Application Solutions
Proper application technique is crucial for achieving a smooth, even cat eye effect. Inadequate mixing of the base and pigment, or uneven application of the pigment itself, can lead to an uneven finish. Ensure the base coat is completely cured before applying the pigment to prevent smudging or bleeding.
- Thorough mixing of the gel pigment and base coat is essential. Using a clean mixing tool and ensuring complete dispersion of the pigment particles will significantly improve the evenness of the final application.
- Applying the pigment in thin, even layers is critical. Avoid applying too much pigment at once, as this can result in clumping and unevenness. Working in small, overlapping sections will yield a more consistent outcome.
- Proper curing time is paramount. Adequate curing ensures that the gel adheres properly and prevents smudging. Following the manufacturer’s recommended curing times is crucial for maintaining a professional finish.
Addressing Chipping and Lifespan
Gel cat eye nail polish, despite its durability, can be susceptible to chipping, particularly with active lifestyles or rigorous daily routines. Several factors influence the lifespan of gel cat eye nails. Protecting the nails with proper maintenance techniques will significantly extend their lifespan.
- Maintaining proper nail care is essential. Regular hydration of the natural nail plate can prevent brittleness and cracking, thus reducing the likelihood of chipping. Using a cuticle oil or moisturizer can help keep nails healthy and less prone to breakage.
- Avoiding harsh chemicals or abrasive materials that may damage the nails is recommended. Protect your nails when cleaning or performing activities that involve frequent contact with harsh substances.
- Proper removal techniques are key. Using the correct acetone and following a gentle removal process prevents unnecessary damage to the natural nails. Avoid harsh scrubbing or forceful pulling that could lead to chipping or lifting.
- Choosing a high-quality gel polish is recommended. High-quality products often possess superior adhesion and durability, which translates to a longer lifespan and less susceptibility to chipping.
Preventing Smudging and Bleeding
Maintaining the pristine look of gel cat eye nails often hinges on preventing smudging and bleeding. Proper curing techniques are paramount to avoid these issues.
- Adequate curing time is crucial. Ensure each layer of gel polish is cured for the specified time in a UV or LED lamp to allow it to fully harden and adhere to the previous layer. Insufficient curing can result in smudging and bleeding, compromising the overall look.
- Using a thin layer of gel polish is recommended. Thick layers of polish can create inconsistencies and increase the risk of smudging or bleeding during the curing process. Applying thin layers allows for better adhesion and prevents imperfections.
- Proper use of tools and techniques is crucial. Employing clean brushes and applying the polish evenly will help prevent smudging and ensure a smooth, professional finish.
Wrap-Up
In conclusion, gel cat eye nail polish offers a world of creative expression and dazzling aesthetics. This guide has provided a thorough overview, empowering you to explore the myriad possibilities of this trend. From application techniques to color palettes and maintenance, the information presented will undoubtedly transform your approach to nail artistry. So, embrace the allure of gel cat eye and let your nails tell a story!
Essential Questionnaire
What are the common mistakes when applying gel cat eye nail polish?
Uneven application, bubbles in the polish, and not prepping the nails properly are common mistakes. Proper nail preparation and slow, controlled application are key to avoiding these issues.
How long does gel cat eye nail polish last?
With proper care, gel cat eye nail polish can last for 2-3 weeks. However, factors like nail health and daily habits can affect longevity. Proper maintenance, such as avoiding harsh chemicals and frequent hand washing, will help extend the life of your manicure.
What are some tips for removing gel cat eye nail polish?
Using a gel polish remover and soaking cotton pads are essential. Avoid harsh scrubbing and follow the instructions carefully. Applying a cuticle oil after removal will help prevent dryness and damage to the nail.
What are the different types of gel cat eye nail polish effects?
Popular gel cat eye effects include shimmer, glitter, and opaque variations. There are also gradient, ombre, and other unique effects you can create. Exploring different colors and techniques can lead to mesmerizing results.
